Description
Daimler/Chrysler, always seeking to improve quality, contacted ART for a total solution for quality control inspection. The portable equipment solution sought was to perform “Z” height measurement analysis of chassis and suspension points for final inspection of their manufactured vehicles. Daimler/Chrysler requirements included speed, accuracy, parametric data collection and main frame communications.
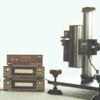
The ART final solution for Daimler/Chrysler was the use of a dual laser arrangement with its standard Laser String II laser source as a foundation. Each laser has the ability of being used independently or simultaneously. The equipment utilizes horizontal laser plane generation for suspension point targeting. The laser source is mounted to a custom designed tri pod with two axis leveling feet which provide coarse adjustment of the horizontal laser plane parallel to the vehicle inspection pad. Final co-planar adjustments are then performed by the five micron fine resolution adjustments available in the standard Laser String II head. The “Z” height targeting is accomplished through the use of a manually driven microscope type rack and pinion stanchion which gives a total laser “Z” travel of six inches. Using various lengths of laser head mounting hardware the six inch laser travel can be positioned at numerous heights. Digital heights for each laser are sensed by a single absolute encoded linear scale with LCD display, SPC output, and a resolution of .0005 inches. Measurements are then feed to remote large character digital display, a 3 channel multiplexer and finally, via RS232, to a laptop computer.
Using optional ART custom windows based software, parametric data is then analyzed, storied and identified with the vehicle identification number. Data is then sent to a host main frame computer via 10baseT Ethernet connection using TCP/IP.


Reviews
There are no reviews yet.